
Forever Ago chapter 1 photos begin in the bedroom, continue during the drive and hike to Woolson Falls, and end with a photograph of Alfred and Audrey together. Photograph the room's subjects before aiming at Alfred outside the window. On the trail, follow the sign, flower, and pose prompts. After the time change, shake the instant photograph and place it in the journal to finish the opening sequence.
This page covers the opening Woolson Falls chapter. It separates the room sweep from the photographs that move the scene forward, so you can finish optional photography before taking the shot that sends the couple out on their trip. It does not treat every object in the room as a mandatory story puzzle.
Opening photo route at a glance
| Stage | Subject or action | Where to look | Progress cue |
|---|---|---|---|
| Bedroom | Camera manual | The instruction material in the opening room | You learn how to frame and take a shot |
| Bedroom | Teddy bear | On the bed | The object is photographed before departure |
| Bedroom | Displayed photographs | Wall beside the study area | The room sweep continues |
| Bedroom | Calendar | Around the same study area | You have checked a separate nearby subject |
| Window | Alfred posing | Outside the bedroom window | The opening moves into the car ride |
| Car ride | Woolson Falls sign | Roadside when Alfred calls attention to it | The journey continues toward the trail |
| Trail | Flowers and Alfred's poses | Ground near arrival, then the walking route | Conversation and camera prompts advance |
| Falls | Couple photograph | At the end of the hike | The sequence changes time |
| Journal | Developed instant photograph | In Alfred's hand, then the journal | The chapter finishes |
Use the table as a route, rather than as a claim that the chapter contains a fixed total of collectible photographs. The camera can capture more than the named story subjects. A personal picture and a required picture can look equally good while serving different purposes.
Sweep the bedroom before photographing Alfred
Begin with the camera manual. The opening is teaching the camera through an object you can immediately recognize, so use the displayed controls rather than guessing a binding from a different platform. Bring the instruction material into view and take the shot. This establishes the basic interaction before you move to the other objects.
Turn toward the bed and photograph the teddy bear. It is a small subject within a larger room, so frame the bear itself rather than taking a wide image dominated by the wall or floor. The bed is the useful landmark: if you lose your orientation while looking around, return to that large piece of furniture and locate the bear again.
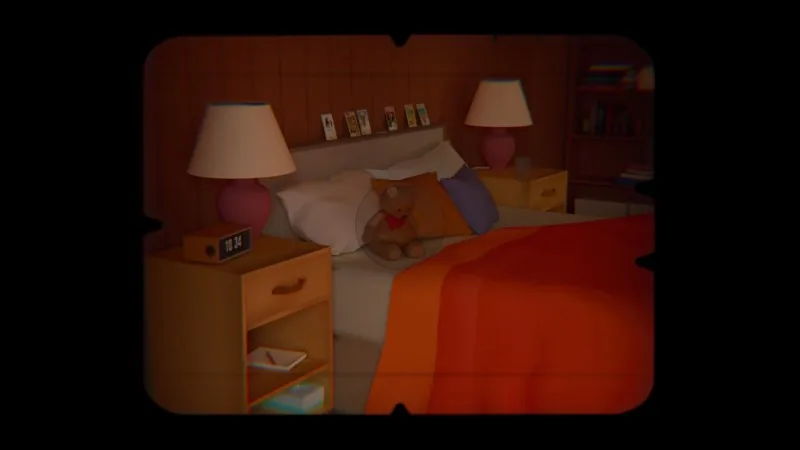
Next, move your attention to the study area. The displayed photographs on the nearby wall and the calendar are separate subjects. Photographing the wall does not tell you whether you also documented the calendar, particularly if your framing leaves it outside the view. Look at each object deliberately and keep the two checks separate.
If you want to inspect more of the opening room, do that during this sweep. The important order is to finish looking around before you take Alfred's photograph through the window. The window shot is the next progression point, and it is easy to take as soon as he calls without first checking the remaining room objects.
You do not need to turn this into a general inventory hunt. Work around recognizable furniture and the wall display, then return to the window. The camera tutorial provides the action; the room layout provides the subjects. Searching for an invented drawer key or a code will not solve this photography sequence.
Photograph Alfred through the window
When Alfred calls from outside, turn toward the window and locate him near the car. He poses for the camera. Aim at Alfred and take the picture to continue into the drive.
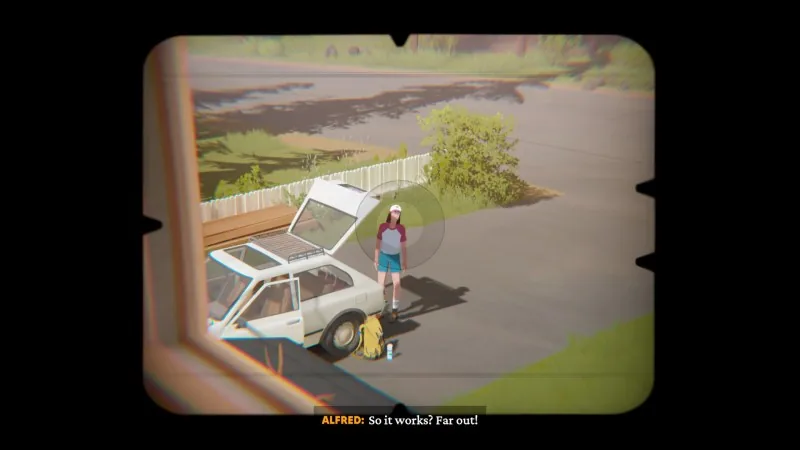
This is the point where subject selection matters more than scenery. An image of the parked car or pavement may document the location, but the prompted action is a photograph of Alfred. Keep him clearly inside the camera view. If you have been turning around to inspect the bedroom, settle the view on the window before taking the shot.
The opening places you in a younger moment from Alfred and Audrey's life, so the person in front of the lens and the person holding the camera are not always the same throughout the chapter. Follow the visible scene and dialogue. Do not assume the later road-trip camera routine already applies to every moment of this introduction.
If you still want a photograph of something in the room, take it before the window shot. Once the next scene begins, complete the drive rather than trying to locate the bedroom within the new environment. Keeping the departure shot last is the cleanest way to finish the opening sweep without confusion.
Capture the roadside sign during the drive
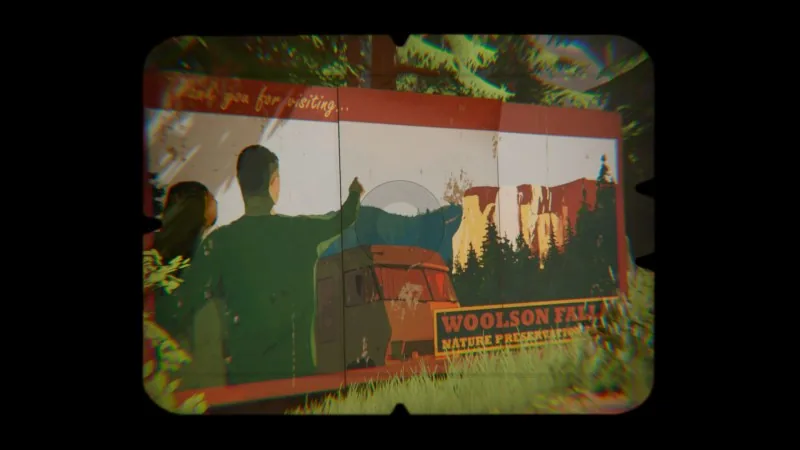
During the car ride, take a photograph and continue the conversation with Alfred. The useful subject arrives when he draws attention to the Woolson Falls sign. Turn toward the roadside sign and photograph it while the scene presents it.
The car sequence is different from the bedroom sweep. You are no longer choosing a stationary subject in a room that you can examine from several directions. The dialogue identifies the next target while the journey is moving forward. Pay attention to that cue, then adjust the view toward the sign instead of continuing to photograph the car interior.
There is no need to invent a separate set of landscape objectives for the drive. The supported route identifies the Woolson Falls sign, not a series of hidden highway markers. A spontaneous picture can be part of the journey, but the sign is the recognizable subject that Alfred specifically points out.
If your framing is awkward, distinguish a camera issue from a scene issue. First check that you are looking through the active camera and pointing at the called-out sign. Then follow the next available dialogue or prompt. Do not assume a low-quality-looking composition means the whole opening needs to be restarted.
Photograph the trail subjects in order
After arrival, look for the flowers close to the ground. Crouch to bring the camera nearer to them and photograph the flowers. This step changes the height of the viewpoint, rather than sending you to a distant hidden location. The task is close to the arrival area, so check the ground nearby before walking farther up the route.
Look left afterward for Alfred's pose and take his photograph. The scene alternates between a small natural subject and a person, which makes it easy to keep aiming at the last thing you photographed. Reorient toward Alfred before using the shutter again.
Later on the trail, photograph another Woolson Falls sign and continue the conversation. When Audrey thanks Alfred and he poses again, take another picture of him. These are successive scene beats. A photograph of the first sign or the first pose does not replace a later prompted photograph simply because the subject is similar.
A practical way to follow this part is to pair each dialogue cue with the object currently in view:
- Check the low flowers after the car ride.
- Turn toward Alfred's nearby pose.
- Follow the route until the next sign is presented.
- Continue the conversation with Alfred.
- Photograph his later pose when the scene calls for it.
The sequence does not require a perfect artistic composition. It requires that you recognize which subject belongs to the current beat. Keep flowers, signs, and Alfred's poses separate in your own checklist so that a repeated-looking target does not become an accidental omission.
Continue after Audrey hands over the camera
Audrey eventually hands the camera to Alfred, and the viewpoint changes to third person. Follow Audrey along the trail and continue the conversations. The change in perspective is part of the opening sequence; it does not mean the camera has disappeared or that you should search the earlier trail for an equipment pickup.
This part connects the prompted photographs to the final viewpoint at Woolson Falls. Keep moving with Audrey along the available route. The opening is no longer asking you to photograph every visible object, so use the walking and interaction prompts that are present rather than staying in the camera indefinitely.
If the scene seems to pause, check what Audrey is doing and whether an interaction or conversation is waiting. Finishing a photograph can lead directly to dialogue, and finishing dialogue can return control for the next stretch of the path. Those changes explain why simply taking more photographs may stop being the action that advances the chapter.
At the end, Alfred and Audrey take a picture together. This photograph links the earlier hike to the later journal interaction. Allow the scene to complete and continue through the time change. The next required action is with the physical instant photograph, rather than another object on the trail.
Develop the photograph and finish the journal step
After the time change, shake the photograph to make the image appear. Follow the on-screen interaction until the developing picture is visible. Then open the journal and place the photograph inside.
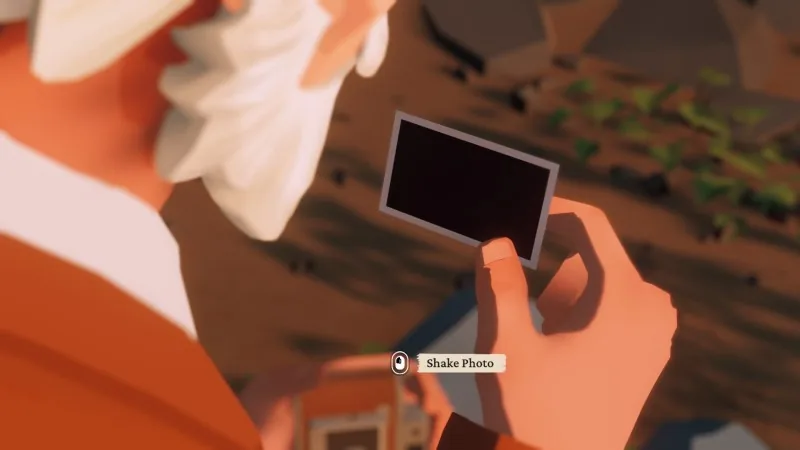
These are two different actions. Developing the instant picture makes it readable; placing it in the journal completes the recording step. If you stop after shaking it, you have not yet performed the journal action that closes the opening chapter.
Use the journal prompt as the completion check. You do not need to retake the couple photograph or find a second copy at Woolson Falls. The picture is already part of the sequence. The remaining task is to finish its development and store it where the game asks.
Before moving on, check the chapter by its transitions: the window photograph led to the drive, the sign and pose sequence led through the hike, the couple photograph led to the time change, and the developed photograph went into the journal. That route gives you concrete progress markers without turning optional room shots into invented story requirements.